Sunday, December 30, 2012

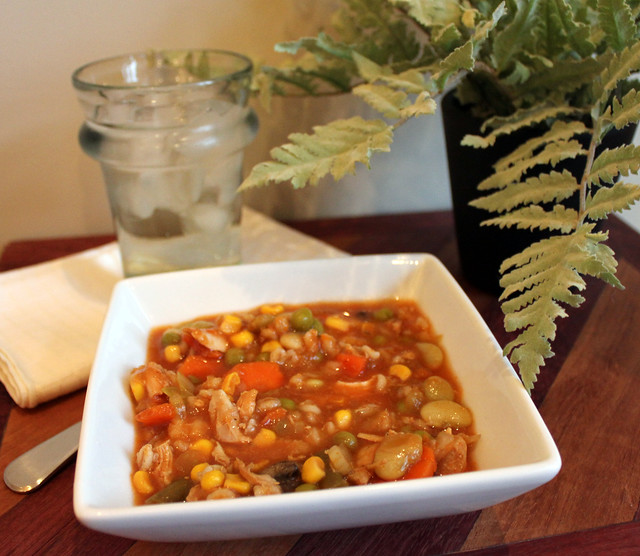
Chicken Vegetable Barley Soup

Perfect Pairing:  New Year’s Resolution Diet
IMG_3416-001

Wow!  What a Christmas!  I had such a wonderful time with my family and friends over the last week.  It all started with my mom’s birthday and was a continuous stream of visits, meals, parties, and gift opening. 
Not that I was surprised, but the holidays were filled with lots of really amazing food and drinks.  Lots.  Some of my favorites were homemade chicken and noodles (my dad and I have a tradition of making the noodles on Christmas Eve), butternut squash risotto, pork brined for 48 hours (my brother is a master), hot buttered rum, and lots of delicious desserts.
Like the rest of the population, I like to hit the “reset” button on January 1.  I look forward to clean eating, regular work-outs, and old routines.  Last January 1 I wrote about one of my favorite healthy desserts, berries and cream.  I will definitely make that again if I have a sweet craving. 
One of my absolute favorite diet foods is soup.  My parents have been making this Chicken Vegetable Barley Soup for years. It is so incredibly healthy and tastes great.  The “secret” ingredient in this soup, that makes it different from other chicken vegetable soups, is Chile Lime Salt.  You can usually find this seasoning in the ethnic section of the grocery store.  It adds a great kick.
This soup starts with a whole chicken, so needless to say, it makes a huge batch.  It freezes beautifully so it is the perfect healthy food to stock in your freezer. 

Thursday, December 20, 2012

St. Germain Champagne Cocktail, or Fantasy Pants

Perfect Pairing:  Holiday celebration
IMG_3575-002

I have mentioned before how much I love having my girlfriends over for our famous “get-togethers”.  They are always filled with good food, friends, stories, and laughs.  It has become a bit of a tradition for me to host the Christmas get-together.  I always decorate my place so I try to plan parties so I can force others to enjoy it. 
I met these wonderful girls while working at the same company, and we were fortunate enough to have some amazing travel experiences that bonded us.  I can’t believe we have all known each other for almost 8 years!  Where does the time go?
A couple of years ago, before one of our Christmas parties, we were emailing about what everyone was going to contribute.  I mentioned that I was going to make a champagne cocktail with rosemary.  One of my friends wrote back and said, “Ooh! Fantasy Pants!”  I thought that was kind of odd, but also kind of a cute name for a drink…. I guess.  I had no idea where she came up with it but I was going with it.  When she showed up at the party I asked her about it and we realized she was trying to write “Fancy Pants” but that darn auto correct had a different plan and she sent it off without realizing it. 
That original cocktail was just so-so, but I really love this version.  It deserves the name Fantasy Pants.  I have had St. Germain recently in a few cocktails and really liked it, so that was my inspiration for this drink.  St. Germain is a French liqueur made from elderflower blossoms.  Sounds tasty, right?  St. Germain is mixed with fresh lime juice and homemade rosemary simple syrup and then topped off with sparkling wine or champagne.  This cocktail is really refreshing and not too sweet.  The subtle hint of rosemary makes it a perfect drink for the holiday season.  I am definitely keeping Fantasy Pants in my repertoire.   

Tuesday, December 18, 2012

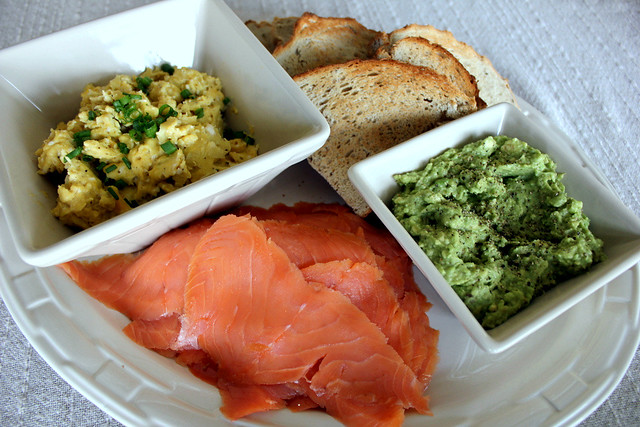
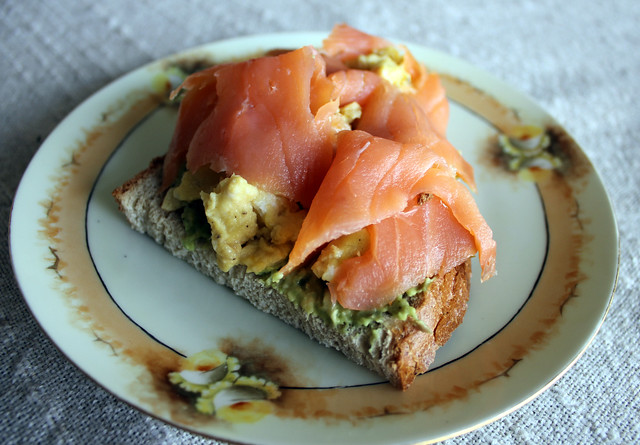
Un-Recipe Files – Smoked Salmon, Scrambled Eggs, and Avocado Toasts


IMG_3091-003
Admittedly, this is pretty similar to one of my favorite posts, Smoked Salmon Breakfast. 
IMG_1788-002
Smoked salmon is just so tasty and easy.  In Smoked Salmon Breakfast 2.0, I paired it with rye toast, scrambled eggs (made to your personal preference), and mashed avocado.  The only thing I added to the avocado was salt and pepper.
IMG_3102-001

This is a great dish to put together for a big group.  Perfect for the holiday season!

Saturday, December 15, 2012

The Truffle Experiment – Peppermint Dark Chocolate, Pumpkin Gingersnap, and Peanut Butter and Bacon Truffles

Perfect Pairing: Styrofoam drying method
IMG_3524-002

 Ok, where do I start?  My mom had some cute trays that she wanted to give as gifts, so we discussed what we could include on the trays.  Truffles seemed like an obvious choice.  Forget the fact that we had never made truffles, let alone tempered chocolate, or made candy in general.  As long as we were getting after it, we might as well make three versions! 
I decided on Peppermint and Dark Chocolate, Pumpkin Gingersnap, and Peanut Butter Bacon truffles.  I made a quick trip to World Market and found some items like pre-chopped peppermint chips, adorable mini liners to hold the truffles, and all of the necessary chocolate.  We were ready to open Willy Wonka’s. 
There are quite a few steps involved in the making of truffles, and they do take quite a bit of time with all of the chilling, but they were actually very easy, and dare I say… fun? The pictures below show the various steps for all three versions.
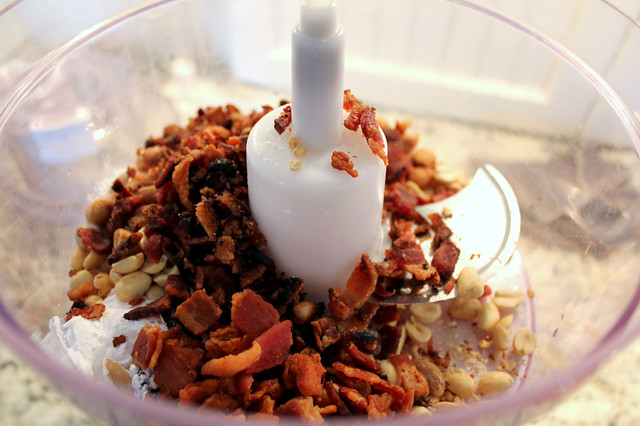
We kicked things off with the Peanut Butter and Bacon truffles.  I mean, how can you go wrong?
IMG_3245-003

Some of the bacon was set aside to top the truffles.  We ran into some issues with people snacking on it.
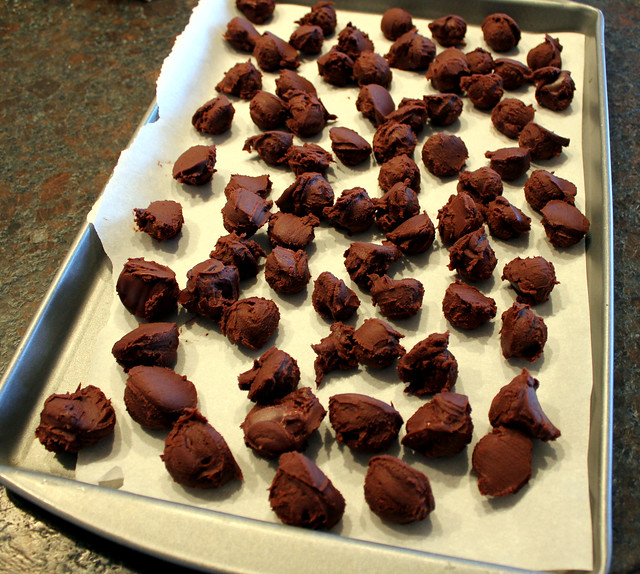
 Next up were the dark chocolate versions with peppermint.  After the inside of the truffle is made you have to let it chill until it starts to harden.  Then, you scoop out the desired size and chill again.  We wanted to make them on the small side, since you really just need a bite.  This mini stainless steel spring scoop was a great time-saver. Scoop, drop, scoop, drop…. You get it.
IMG_3249-002

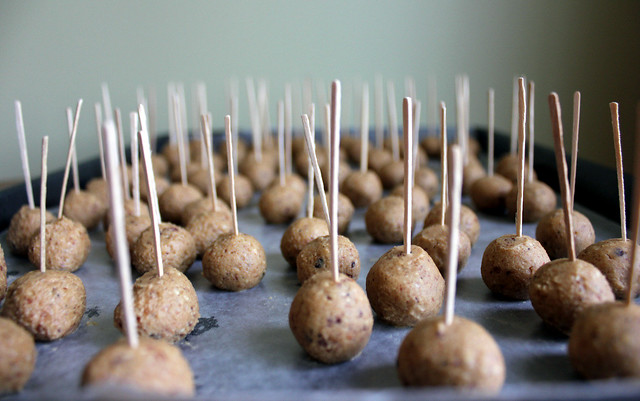
 After another round in the freezer they are ready to be rolled into perfect spheres with the palms of your hands.  Then you stick a toothpick in the middle of each truffle and return them to the freezer.  The toothpick is part of my perfect pairing, “Styrofoam drying method”.  Stick with me.
IMG_3272-001

 Next up is melting/tempering the chocolate.  Tempering the chocolate is not 100% necessary, but it is supposed to make the surface shiny and the chocolate will “snap” when you bite into the truffle.  I was stationed right by the chocolate over the double boiler so I could remove it as soon as it got to 110 degrees F.  For some unknown reason when I took it off the heat the temperature kept going up.  I think it got up to 135 or something.  I blame the thermometer.  So, for the record I did attempt to temper the chocolate but I’m pretty sure I screwed it up.  Either way, it worked out just fine.  My truffles may not snap in your mouth, but I’m over it.
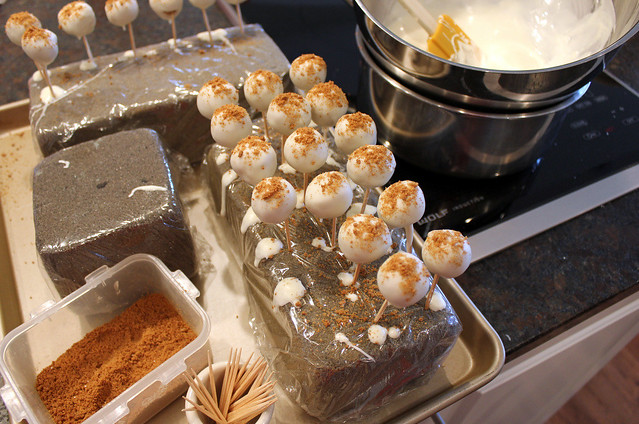
Time to dip! My mom is so smart.  She came up with the idea to cover Styrofoam in plastic wrap to hold the drying truffles.  Brilliant.  The plastic wrap keeps the foam clean so you can use it again next year.  Holding the toothpick I would dip the truffle into the melted chocolate (or almond bark for the pumpkin version) until it almost completely coats the truffle.  I left a little space at the bottom so it did not stick to the toothpick and so they would stay put and not roll away.  Then you stick the toothpick into the foam.  We set the blocks outside in the chilly air until they hardened.  Then you slip the truffle off the toothpick and they can be gently stacked in a container and frozen until ready to use.
IMG_3267-001

My mom came up with another great idea for displaying the truffles on the small tray.  She was afraid the liners would slide around so she put a dot of chocolate on the bottom of the liner and stuck it to the tray.  It worked beautifully.

Since we made about 180 truffles we had to come up with innovative ways to give them away. 
 We also ordered these cute confection boxes.
The truffles may not be as easy as the Chocolate Covered Peanut Butter Pretzels, but I think we may have found a new tradition.  They are delicious and so stinking cute!  I love them and I love giving them away.

Wednesday, December 12, 2012

German Sugar Cut-Out Cookies

Perfect Pairing:  The most amazing decorating trick I have ever seen
IMG_3375-002

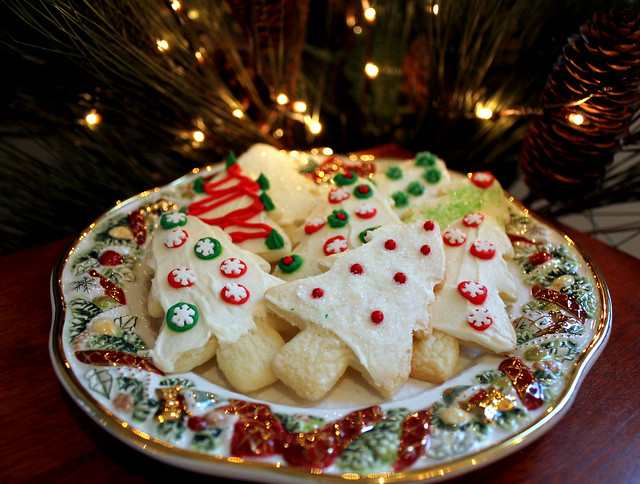
When I was in high school I decided to have a Christmas party with all of my girlfriends.  I had visions of Harry Connick Jr. tunes, apple cider, and cookie decorating.  I told my mom that everyone was SUPER excited to decorate cookies so she should double whatever recipe we use.  Mom did not have a favorite cut-out cookie recipe so she called her good friend, Jan Sanger.  Jan is one of the most amazing cooks we know, so we knew she would have a great recipe, and she did.  She gave my mom this German Sugar Cut-Out Cookie recipe and we have used it every year since then.  The cookies are thin and slightly crisp, but still chewy, and have just the right amount of sweetness.  They are also really easy to roll out and the finished product keeps beautifully in the freezer.
The original recipe makes A LOT of cookies.  In fact, the recipe below is actually cut in half and it still makes a lot.   Since my high school Christmas party was the first time using the recipe, and I insisted on doubling, mom doubled it.  Oh. My. Cookies.  Predictably, my squirrely girlfriends and I lost interest after frosting a few each and moved on to giggling in the basement.  My poor mom and dad were left with the never-ending cookie production line.  I laugh every time I think of my poor dad being forced to frost a million cookies.  He really lost his Christmas spirit that night!  Towards the end he was just dunking them in the bowl of frosting. 
IMG_3260

We have used a few different frosting recipes, and really you can use your favorite, but this year we used this recipe for meringue powder buttercream.  It worked beautifully.  We used the same frosting to frost the base of the cookie and for the colored decorations. 
I am sure most people would agree that one of the most frustrating parts of frosting cookies is cleaning out the decorator bags.  It is so obnoxious.  While searching for the frosting recipe I came across this video clip on Karen’s Cookies on how to use a decorator bag without getting it dirty, AT ALL.  Too good to be true??  No!  It works!  It blew my mind.  It is so simple!  How had I never heard about this?  Life changing. 

Monday, December 10, 2012

Slow Cooker Coq au Vin

Perfect Pairing:  Elegant dinner party
IMG_2847
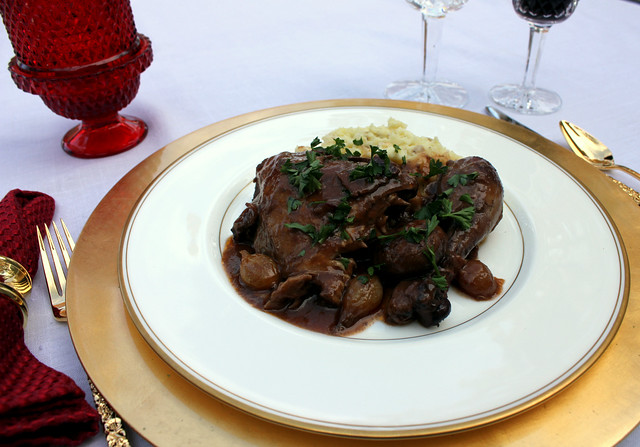
Right after my parents moved into their new home I made a quick trip to help them get settled and unpack.  I mentioned in this cupcake post that I was really not much help to them because I was completely distracted by the kitchen and wanted to cook the entire time. 
 
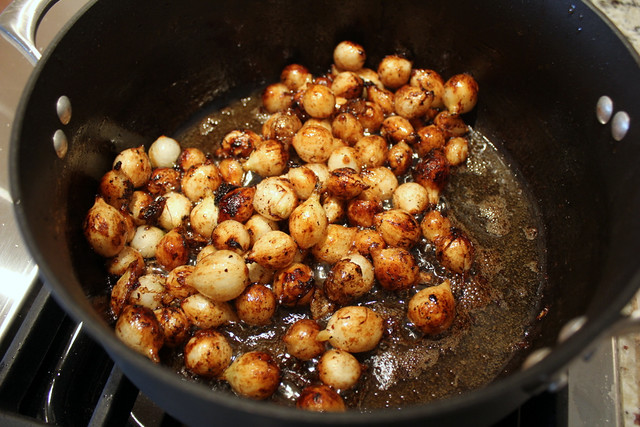
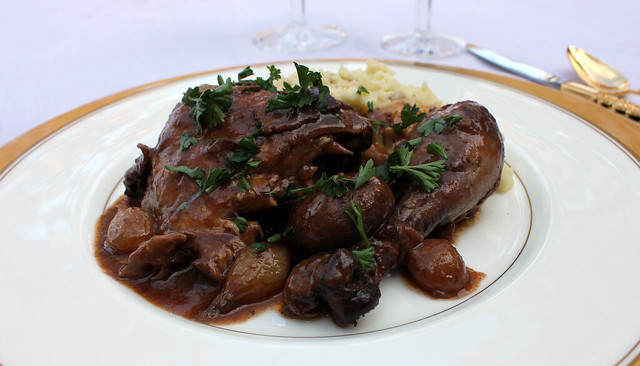
I truly did have good intentions to help, and when I was thinking about what to make for the weekend I thought chicken in the slow cooker would be a great idea.  I could prepare it in the morning and forget about it all day while we unpacked.  Then I got the brilliant idea to make Coq au Vin in the slow cooker.  Well I am so glad I did because it was absolutely delicious, but it was not your standard “throw it in and forget about it” slow cooker recipe.  Not even a little bit.  Admittedly, there are multiple steps in this recipe and a lot of ingredients, but it is totally worth it.  It makes a delicious dish that is rich and comforting.  Trust me, it was scrumptious.
IMG_2743-001
IMG_2744-001
IMG_2749-002


The benefit of using a slow cooker in this recipe is not convenience, but rather it makes the chicken fall off the bone tender.  Letting the wine simmer for hours with the vegetables and herbs gives the sauce a lot of depth.  It may seem strange to throw away the carrots, celery, etc., after it cooks but they are in the recipe purely to add flavor to the sauce.  Of course, Coq au Vin is best served with homemade mashed potatoes so you can fully enjoy the fantastic sauce.
The Perfect Pairing for this recipe is an elegant dinner party.  I made this dish for myself and my parents but we all remarked that it would be great at a nice dinner party.  Ok, so maybe my dad did not say this, but I am sure he agreed with us.  I am hoping to make this for my family on Christmas.  It makes the entire house smells rich and fabulous.  Don’t be dissuaded by the steps and ingredients.  You will feel like Julia Child when you put this on the table.
IMG_2862-001


Wednesday, December 5, 2012

Un-Recipe Files – Chocolate Covered Peanut Butter Pretzels

IMG_3460-001

How could Chocolate Covered Peanut Butter Pretzels be bad?  Answer:  Not possible.
A few years ago I participated in a cookie exchange and had the brilliant idea to make chocolate covered peanut butter and caramel pretzels.  Basically I spread a little peanut butter and melted caramel on pretzel twists and then dipped the whole thing in chocolate.  Holy mess.  They tasted great (how could they not?) but it was not worth the time and mess.
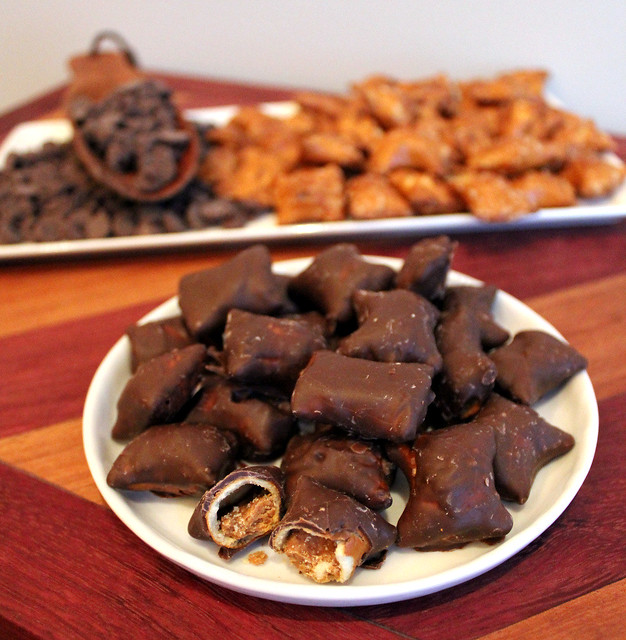
Fast forward a few years and I came up with this version.  The store bought peanut butter pretzel nuggets make this process so easy.  My mom and I made these over the Thanksgiving weekend to have for parties and gifts throughout the holiday season.  They keep really well in the freezer so they can be made well in advance.
IMG_3437-001

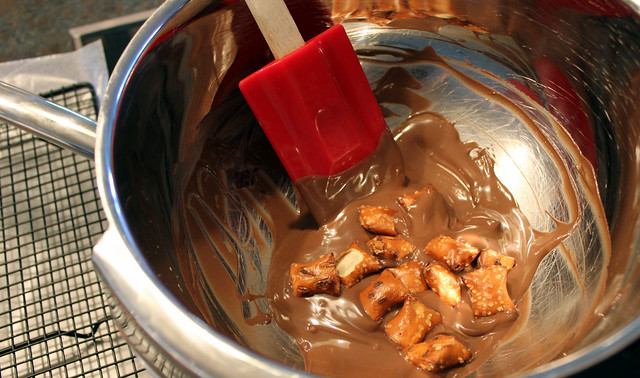
I melted the chocolate in a double boiler (metal or glass bowl over simmering water).  I used chocolate almond bark and added about a teaspoon of shortening (1 tsp for every 6 oz of almond bark) to thin it out a little bit.  You could also use semi sweet chocolate chips or dark chocolate. 
IMG_3251

Once the chocolate melted I threw in a handful of the pretzels and rolled them around until they were coated.  I fished them out with a fork and let them harden on waxed paper.  You can see in the first picture that I started out using a wire rack.  That really did not work out because they stuck to the rack.  Waxed paper is the way to go.
IMG_3253
Wine is optional, but recommended. 
IMG_3257

We used the great outdoors to finish the chilling/hardening process.  Make sure they are completely hardened before putting them in a bag or container. 
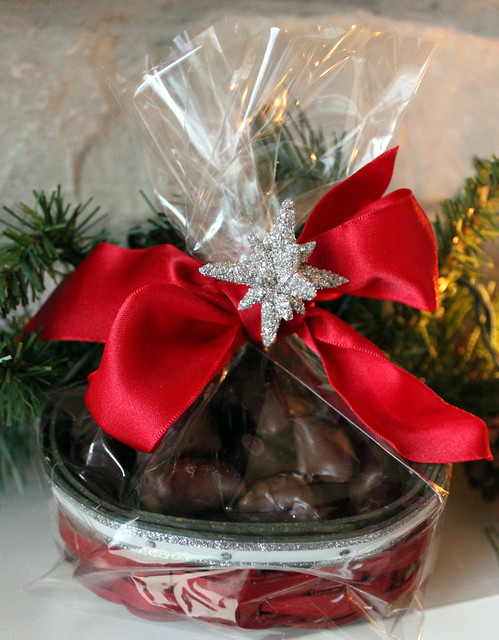
I think these are going to be a new holiday tradition.  They were so easy and delicious.  They are the perfect thing to add to a cute little basket or dish to give as a gift!
IMG_3482


Sunday, December 2, 2012

Basil Slice and Bake Crackers

Perfect Pairing:  www.WTSO.com
IMG_2088-001

I don’t know about you, but all of the Cyber Monday/Week commercials/e-mails/banner ads last week made me feel like a chump for not taking advantage of the deals.   Ack!  YES!  I DO want to save gobs of money and take advantage of free shipping! 
It is just barely December and I have major guilt about not having my Christmas shopping done.  Amazon.com, stop pressuring me.  
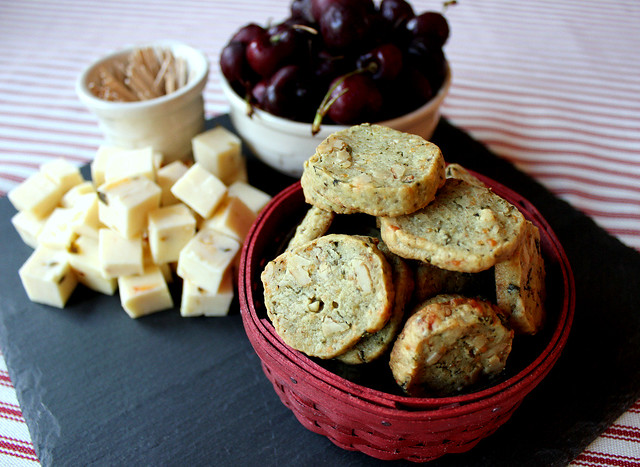
Early December also means full swing party planning mode.  I have a few get-togethers scheduled this month and I have a running list of possible appetizers to make.  These Basil Slice and Bake Crackers are perfect for holiday parties.  They can be made way in advance and frozen until party day.  Slice and bake what you need right before the party.  They smell crazy good while they are baking.
These savory homemade crackers are packed with good stuff like parmesan cheese, pesto, fresh basil, and nuts. 
After making the dough you divide it in half and roll each half in plastic wrap and freeze until you are ready to bake the crackers.

 Basil Slice and Bake Crackers are the perfect pairing for a glass of wine!  
A couple of years ago I heard about www.WTSO.com, a discount wine website.  They only sell one wine at a time at a discount of 30% - 70%.  They always offer free shipping when you buy the minimum amount, which is usually about four bottles. 
My dad is a tough guy to shop for, but my brothers and I have had great success with WTSO gift certificates for his birthday and Father’s Day.  He enjoys looking at the different deals and has ordered some amazing wines.  I happen to know a few of the orders went through on his smart phone while out on the combine. 
WTSO.com gift certificates could be the perfect gift or stocking stuffer for your loved ones this holiday season.  Fortunately, there is no need to worry about cyber Monday deals, they are always discounted!
Related Posts Plugin for WordPress, Blogger...