Showing posts with label technique. Show all posts

Saturday, December 15, 2012

The Truffle Experiment – Peppermint Dark Chocolate, Pumpkin Gingersnap, and Peanut Butter and Bacon Truffles

Perfect Pairing: Styrofoam drying method
IMG_3524-002

 Ok, where do I start?  My mom had some cute trays that she wanted to give as gifts, so we discussed what we could include on the trays.  Truffles seemed like an obvious choice.  Forget the fact that we had never made truffles, let alone tempered chocolate, or made candy in general.  As long as we were getting after it, we might as well make three versions! 
I decided on Peppermint and Dark Chocolate, Pumpkin Gingersnap, and Peanut Butter Bacon truffles.  I made a quick trip to World Market and found some items like pre-chopped peppermint chips, adorable mini liners to hold the truffles, and all of the necessary chocolate.  We were ready to open Willy Wonka’s. 
There are quite a few steps involved in the making of truffles, and they do take quite a bit of time with all of the chilling, but they were actually very easy, and dare I say… fun? The pictures below show the various steps for all three versions.
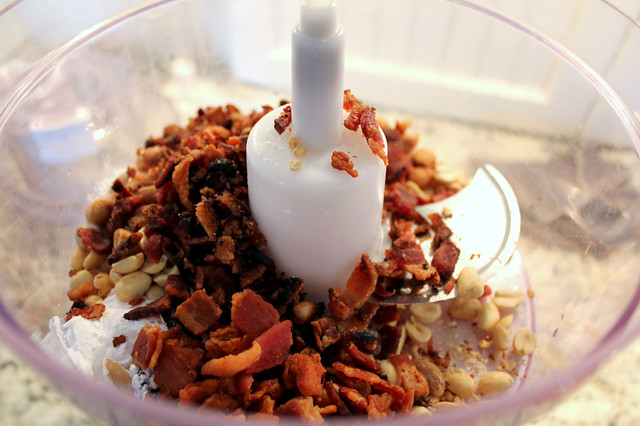
We kicked things off with the Peanut Butter and Bacon truffles.  I mean, how can you go wrong?
IMG_3245-003

Some of the bacon was set aside to top the truffles.  We ran into some issues with people snacking on it.
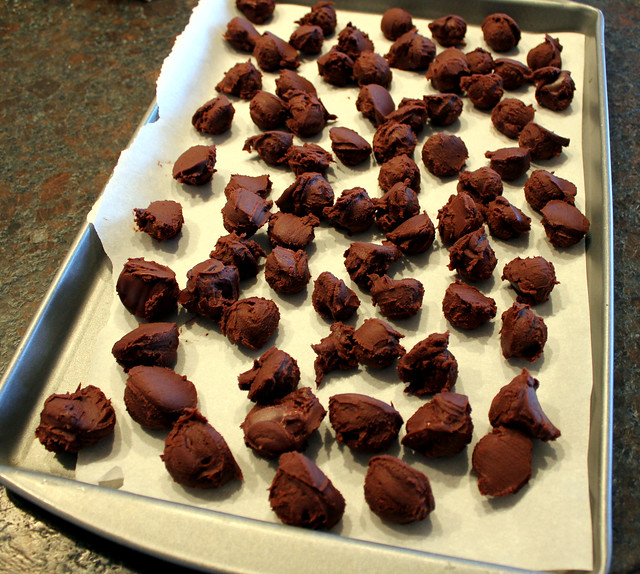
 Next up were the dark chocolate versions with peppermint.  After the inside of the truffle is made you have to let it chill until it starts to harden.  Then, you scoop out the desired size and chill again.  We wanted to make them on the small side, since you really just need a bite.  This mini stainless steel spring scoop was a great time-saver. Scoop, drop, scoop, drop…. You get it.
IMG_3249-002

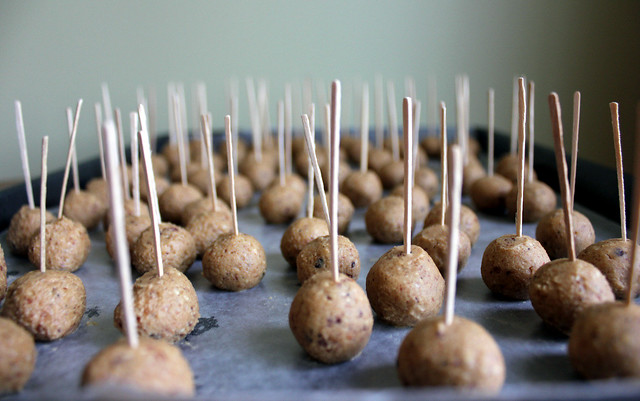
 After another round in the freezer they are ready to be rolled into perfect spheres with the palms of your hands.  Then you stick a toothpick in the middle of each truffle and return them to the freezer.  The toothpick is part of my perfect pairing, “Styrofoam drying method”.  Stick with me.
IMG_3272-001

 Next up is melting/tempering the chocolate.  Tempering the chocolate is not 100% necessary, but it is supposed to make the surface shiny and the chocolate will “snap” when you bite into the truffle.  I was stationed right by the chocolate over the double boiler so I could remove it as soon as it got to 110 degrees F.  For some unknown reason when I took it off the heat the temperature kept going up.  I think it got up to 135 or something.  I blame the thermometer.  So, for the record I did attempt to temper the chocolate but I’m pretty sure I screwed it up.  Either way, it worked out just fine.  My truffles may not snap in your mouth, but I’m over it.
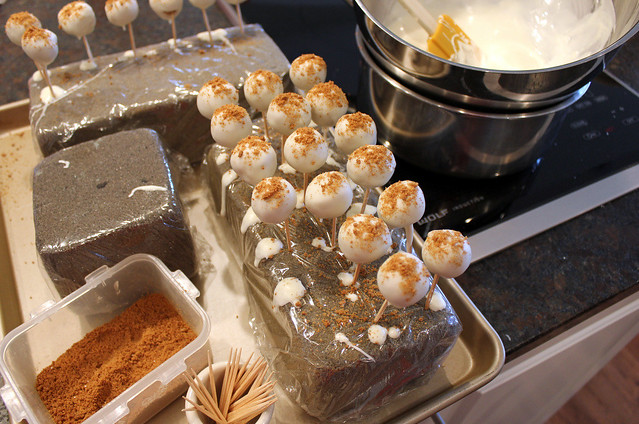
Time to dip! My mom is so smart.  She came up with the idea to cover Styrofoam in plastic wrap to hold the drying truffles.  Brilliant.  The plastic wrap keeps the foam clean so you can use it again next year.  Holding the toothpick I would dip the truffle into the melted chocolate (or almond bark for the pumpkin version) until it almost completely coats the truffle.  I left a little space at the bottom so it did not stick to the toothpick and so they would stay put and not roll away.  Then you stick the toothpick into the foam.  We set the blocks outside in the chilly air until they hardened.  Then you slip the truffle off the toothpick and they can be gently stacked in a container and frozen until ready to use.
IMG_3267-001

My mom came up with another great idea for displaying the truffles on the small tray.  She was afraid the liners would slide around so she put a dot of chocolate on the bottom of the liner and stuck it to the tray.  It worked beautifully.

Since we made about 180 truffles we had to come up with innovative ways to give them away. 
 We also ordered these cute confection boxes.
The truffles may not be as easy as the Chocolate Covered Peanut Butter Pretzels, but I think we may have found a new tradition.  They are delicious and so stinking cute!  I love them and I love giving them away.

Wednesday, December 12, 2012

German Sugar Cut-Out Cookies

Perfect Pairing:  The most amazing decorating trick I have ever seen
IMG_3375-002

When I was in high school I decided to have a Christmas party with all of my girlfriends.  I had visions of Harry Connick Jr. tunes, apple cider, and cookie decorating.  I told my mom that everyone was SUPER excited to decorate cookies so she should double whatever recipe we use.  Mom did not have a favorite cut-out cookie recipe so she called her good friend, Jan Sanger.  Jan is one of the most amazing cooks we know, so we knew she would have a great recipe, and she did.  She gave my mom this German Sugar Cut-Out Cookie recipe and we have used it every year since then.  The cookies are thin and slightly crisp, but still chewy, and have just the right amount of sweetness.  They are also really easy to roll out and the finished product keeps beautifully in the freezer.
The original recipe makes A LOT of cookies.  In fact, the recipe below is actually cut in half and it still makes a lot.   Since my high school Christmas party was the first time using the recipe, and I insisted on doubling, mom doubled it.  Oh. My. Cookies.  Predictably, my squirrely girlfriends and I lost interest after frosting a few each and moved on to giggling in the basement.  My poor mom and dad were left with the never-ending cookie production line.  I laugh every time I think of my poor dad being forced to frost a million cookies.  He really lost his Christmas spirit that night!  Towards the end he was just dunking them in the bowl of frosting. 
IMG_3260

We have used a few different frosting recipes, and really you can use your favorite, but this year we used this recipe for meringue powder buttercream.  It worked beautifully.  We used the same frosting to frost the base of the cookie and for the colored decorations. 
I am sure most people would agree that one of the most frustrating parts of frosting cookies is cleaning out the decorator bags.  It is so obnoxious.  While searching for the frosting recipe I came across this video clip on Karen’s Cookies on how to use a decorator bag without getting it dirty, AT ALL.  Too good to be true??  No!  It works!  It blew my mind.  It is so simple!  How had I never heard about this?  Life changing. 

Monday, June 11, 2012

Garlic and Herb Cheese Crostini with Summer Tomato Sauce

Perfect Pairing:  Cooking spray
IMG_9968

If you go to my recipes link you will notice that the area with the most recipes is the appetizer section.  I don’t know if this is because usually I make multiple appetizers at once for a party, or if I just really like appetizers. 
Today I am adding another great recipe to that section.  I can’t say enough good things about this tasty little canapé.  I love the Summer Tomato Sauce I wrote about last September and wanted to re-purpose it for use in an appetizer.  It is so good on this cheesy crostini.  The bread is toasty, the cheese is creamy, and the sauce is sweet and full of summer flavors.  It is a cinch to make and will be a hit at any party.  I served it up before Easter dinner and the platter was empty in minutes.
The Perfect Pairing for this recipe is good old cooking spray.  I used to brush my bread slices with olive oil to crisp them up but a coating of cooking spray will do the same thing, and it is a lot easier.

Thursday, May 24, 2012

Wedge Salad

Perfect Pairing:  Core removal technique
IMG_9858

Iceberg lettuce does not get much love on food blogs or in restaurants.  It is not too surprising since there is not a lot of nutritional value, or flavor.   When I make a salad I usually go for spinach, arugula, or field greens.   That being said, there are some recipes that absolutely require iceberg lettuce.  One of those is the classic wedge salad.
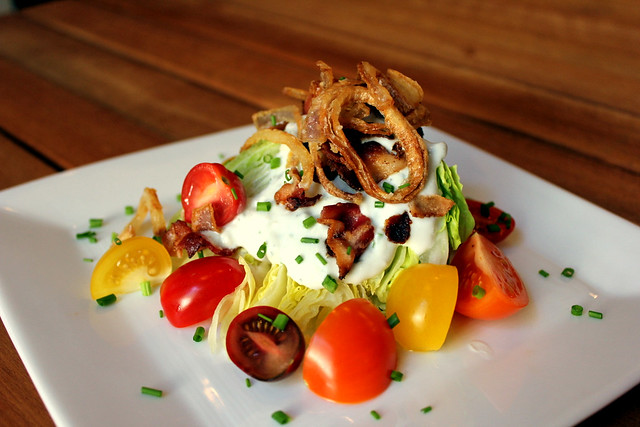
How can you go wrong with a wedge salad?  This popular steakhouse dish usually consists of a crisp wedge of iceberg lettuce, bacon, tomatoes, and blue cheese dressing.  All good things.  I kept my version pretty traditional but included fried shallots.  I used multi-colored tomatoes to add some visual appeal.   I decided to make a homemade blue cheese dressing with greek yogurt, buttermilk, and high quality blue cheese.  The homemade dressing was tasty but I think the salad would be great with store-bought dressing. 
The Perfect Pairing for this tasty salad is the core removal technique I use on iceberg lettuce.  Maybe everyone already knows this but this might be my favorite part about salad prep, so I had to share!  Hold the head of iceberg in both hands with the core facing the counter.  Bang the core directly onto the counter with a good amount of force.  This releases the core from the rest of the lettuce so you can pull it right out!  Now your lettuce is ready to be wedged.  Can I use that as a verb?  I just did.

Tuesday, April 24, 2012

Fajita Potatoes

Perfect Pairing:  Baked Potato Method
IMG_9772-001

I am a Friends addict.  I am not talking about my real-life buddies (I love you all, but that is not today’s subject). I am talking about the best sitcom to ever be on television.  I am sure not everyone agrees with me, but it is my blog so I can say things like that! 
I never get sick of Friends.  I have every episode, and that is usually what is hanging out in my DVD player.  I can pretty much relate any situation back to a Friends episode.  Stick around and I will prove this theory by somehow relating all of this back to a baked potato. 
I love all of the Thanksgiving episodes.  My favorite was probably in Season 6 when Rachel tries to make the Thanksgiving dessert.  Everyone is a little nervous about her taking on such a big responsibility but she had confidence in herself…..
Rachel: Monica said I could make dessert this year!
Joey: Uh-you're going to...cook something?
Rachel: Hey I cook!
Chandler: Offering people gum is not cooking.
Phoebe: Are you sure Monica said you could make something this year? Because I remember her saying in two years. (to Monica) You said in two years right?
Monica: (a little hesitant now) No...I...I promised her. But uh Rach...are you sure you didn't want to start out something as big as Thanksgiving dinner? I mean maybe...you wanna try a little Thanksgiving breakfast....maybe Thanksgiving snack?
Rachel: What? You guys I could do this. Remember I made those peanut butter cookies?
(Everybody acts less than enthused)
Rachel: I don't know what you guys are so worried about. Cooking is easy. You just follow the recipe. If it says boil two cups of salt, you boil two cups of salt.

I laugh every single time I see that scene.  Even writing it out makes me laugh!  Hilarious. 
In another episode Rachel wants to impress her new boyfriend by making him dinner.  **Side note, I totally relate to this and stress over what to make my honey.   Anyway, Rachel sweet talks Monica into making the dinner for her.  When Rachel gets a little too picky about the menu Monica threatens to pull out of the deal and Rachel will be stuck making her “famous baked potato and diet coke.”   
And now we have come full circle.
Is there anything easier than a baked potato??  Even Rachel can make it.  There are so many ways to dress it up.  This fajita potato was quick, easy, and yummy.  A perfect weeknight meal.  The perfectly cooked potato is topped with shredded cheese, chicken (I used store-bought rotisserie), fajita peppers and onions, and a spicy adobo sauce.  The adobo sauce is made with fat free Greek yogurt and chipotle peppers in adobo sauce.  You can find these in the canned goods near the taco fixings.  They are really spicy so start with a little and add more to your taste. 
The Perfect Pairing for this recipe is the never fail method I use to bake perfect potatoes.  The end result is crispy skin on the outside and perfect potato goodness on the inside.  Here is what you do…. Wash and dry the potatoes, prick with a fork 5 to 8 times to release steam, toss in a bowl with canola or vegetable oil until they have a light coating, sprinkle with kosher salt, bake in the oven (directly on the rack) at 350 degrees for about 1 hour or until the skin is crispy and the center of the potato is soft when tested with a sharp knife.  If you need to hurry the process along you can nuke the potatoes for a couple of minutes before you bake them, but don’t have them in the microwave for too long.
Related Posts Plugin for WordPress, Blogger...