Showing posts with label truffle. Show all posts

Saturday, December 15, 2012

The Truffle Experiment – Peppermint Dark Chocolate, Pumpkin Gingersnap, and Peanut Butter and Bacon Truffles

Perfect Pairing: Styrofoam drying method
IMG_3524-002

 Ok, where do I start?  My mom had some cute trays that she wanted to give as gifts, so we discussed what we could include on the trays.  Truffles seemed like an obvious choice.  Forget the fact that we had never made truffles, let alone tempered chocolate, or made candy in general.  As long as we were getting after it, we might as well make three versions! 
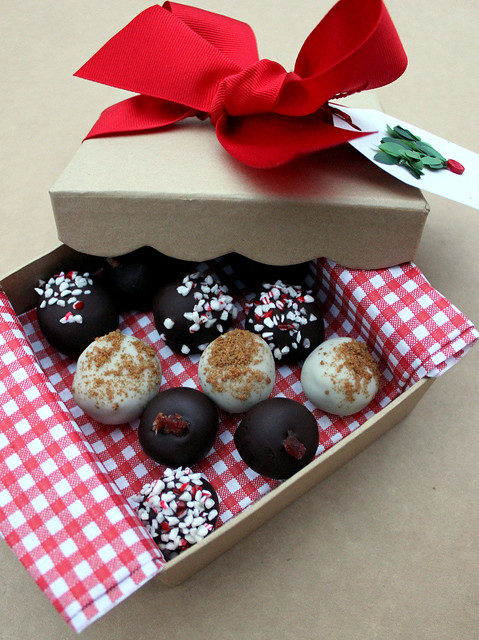
I decided on Peppermint and Dark Chocolate, Pumpkin Gingersnap, and Peanut Butter Bacon truffles.  I made a quick trip to World Market and found some items like pre-chopped peppermint chips, adorable mini liners to hold the truffles, and all of the necessary chocolate.  We were ready to open Willy Wonka’s. 
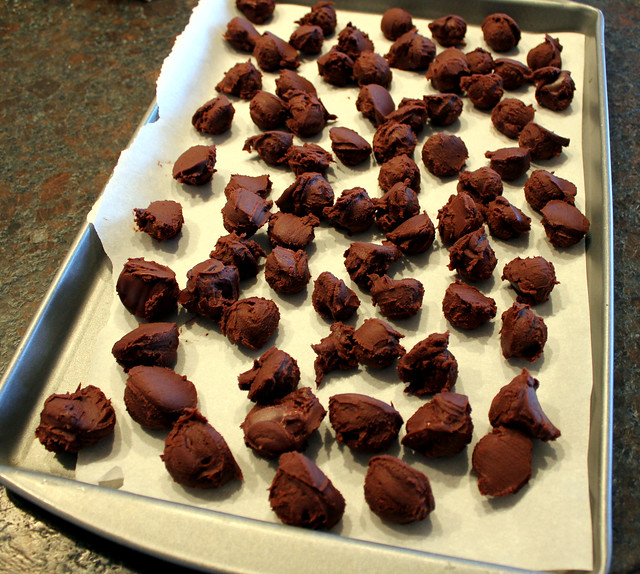
There are quite a few steps involved in the making of truffles, and they do take quite a bit of time with all of the chilling, but they were actually very easy, and dare I say… fun? The pictures below show the various steps for all three versions.
We kicked things off with the Peanut Butter and Bacon truffles.  I mean, how can you go wrong?
IMG_3245-003

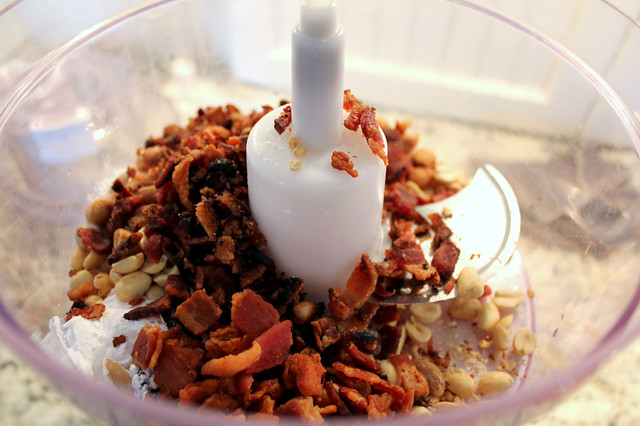
Some of the bacon was set aside to top the truffles.  We ran into some issues with people snacking on it.
 Next up were the dark chocolate versions with peppermint.  After the inside of the truffle is made you have to let it chill until it starts to harden.  Then, you scoop out the desired size and chill again.  We wanted to make them on the small side, since you really just need a bite.  This mini stainless steel spring scoop was a great time-saver. Scoop, drop, scoop, drop…. You get it.
IMG_3249-002

 After another round in the freezer they are ready to be rolled into perfect spheres with the palms of your hands.  Then you stick a toothpick in the middle of each truffle and return them to the freezer.  The toothpick is part of my perfect pairing, “Styrofoam drying method”.  Stick with me.
IMG_3272-001

 Next up is melting/tempering the chocolate.  Tempering the chocolate is not 100% necessary, but it is supposed to make the surface shiny and the chocolate will “snap” when you bite into the truffle.  I was stationed right by the chocolate over the double boiler so I could remove it as soon as it got to 110 degrees F.  For some unknown reason when I took it off the heat the temperature kept going up.  I think it got up to 135 or something.  I blame the thermometer.  So, for the record I did attempt to temper the chocolate but I’m pretty sure I screwed it up.  Either way, it worked out just fine.  My truffles may not snap in your mouth, but I’m over it.
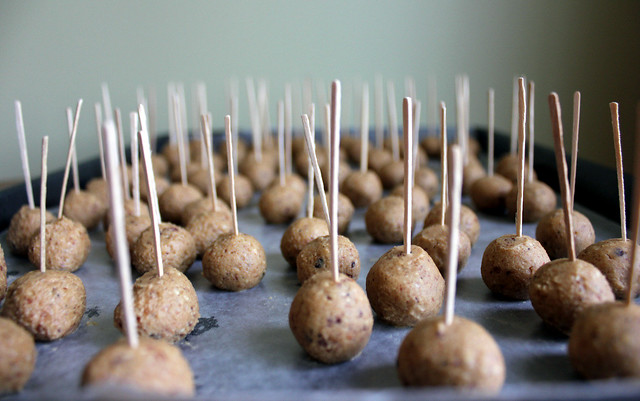
Time to dip! My mom is so smart.  She came up with the idea to cover Styrofoam in plastic wrap to hold the drying truffles.  Brilliant.  The plastic wrap keeps the foam clean so you can use it again next year.  Holding the toothpick I would dip the truffle into the melted chocolate (or almond bark for the pumpkin version) until it almost completely coats the truffle.  I left a little space at the bottom so it did not stick to the toothpick and so they would stay put and not roll away.  Then you stick the toothpick into the foam.  We set the blocks outside in the chilly air until they hardened.  Then you slip the truffle off the toothpick and they can be gently stacked in a container and frozen until ready to use.
IMG_3267-001

My mom came up with another great idea for displaying the truffles on the small tray.  She was afraid the liners would slide around so she put a dot of chocolate on the bottom of the liner and stuck it to the tray.  It worked beautifully.

Since we made about 180 truffles we had to come up with innovative ways to give them away. 
 We also ordered these cute confection boxes.
The truffles may not be as easy as the Chocolate Covered Peanut Butter Pretzels, but I think we may have found a new tradition.  They are delicious and so stinking cute!  I love them and I love giving them away.

Monday, August 6, 2012

Truffled Breadsticks

Perfect Pairing:  Assorted containers
IMG_0763

I already wrote about my love of truffle pate, now you are going to hear all about my love of truffle salt.  I use truffle pate and truffle salt because I can’t afford to even be in the same room as an actual truffle, so this is as close as it gets for a single girl on a budget.
I first purchased truffle salt at an adorable gourmet store on a girl’s trip to Galena, IL.  I am pretty sure my friends thought I had lost it when I purchased the 4 oz jar for $18.  I believed in that salt.  I had big plans for that salt, which is what I told them. 
I have not regretted that purchase for a minute!  I use that salty, truffle-y goodness on everything and it transforms the dish.  Baked potato?  Perfect.  Steamed vegetables?  Makes them fancy.  Eggs?  Gourmet.  I have barely made a dent in the jar, so I feel like I got my money’s worth.  I even ordered it as stocking stuffers for Christmas.
I made these truffled breadsticks at a recent party and they were a hit.  I served them with the meal but you could definitely put them out as an appetizer.
Did you know that puff pastry is very forgiving?  I learned that little tidbit while cooking for said party.  My girlfriend, Amy, and I took on the challenge of cooking for our small group from church.  I think we ended up making 10+ dishes from scratch, in one day.  It was a little chaotic but we had a great time.  Anyway, I put the puff pastry out to defrost and completely forgot about it (next to the oven).  By the time I got around to the breadsticks the pastry was completely stuck together and in no mood to unfold.  I ended up just rolling it out while folded and it worked!
IMG_0784

The Perfect Pairing for Truffled Breadsticks are assorted containers.  I love how they look in containers of various colors and shapes.
IMG_0782

Related Posts Plugin for WordPress, Blogger...